Animated_sqr
Contents
1.1 ... Synth Overview and requirements
1.2 ... What is additive synthesis?
1.3 ... Parts of Additive Synth
2.1 ... The Oscillator section
3.1 ... The Mix Section
3.2 ... The Formant Mix Mode
4.1 ... The Mod Section
5.1 ... Tricks
5.2 ... Making arpeggios and rythmic sequences
5.3 ... Making your own wave sequence
5.4 ... A note about presets
Appendix A: Included Waves (need pics)
1.1 Synth Overview and requirements
Additive Synth offers many possibilities not found in traditional analog synths. Traditional subtractive methods provide you with a few waveforms and to get different timbres you must filter out certain parts in order to get the sounds you want. Additive synthesis lets you build the sound from the ground up, choosing what parts you want and allowing you to do tonal variations which are not possible in other synths. The Kawai K5000 was an inspiration for this synth, but there are many differences in what you can do. Where the K5000 allows you to specify envelopes for each harmonic, this version allows you to make a table of harmonic changes. Like a the Waldorf Wave synths, you can traverse the table by using the envelopes or LFO's to change the table index. So, this synth is more like an "Additive Wavetable" synth. Additive wave sequences are stored as simple 128x128 images (128 Harmonics x 128 Time indexes). Because of this system, you can quickly and visually edit the harmonics in a paint program and load them into the synth. You can also do more wild tonal variations using this method. Like the K5000, I also have included a 128 band Formant Filter mode. The formant filter allows you to imitate accoustic instrument body resonances, vocal vowel sounds, analog filter sounds and even unimagined, unnatural timbre variations. As an added bonus, the formant filter can also be wave-sequenced allowing you to draw filter sweeps, vocalizations and other changes. Since LFO's can be tempo synced, the ability exists arpeggio-like patterns and even rythmic formant changes, if waves are drawn properly. Additive synth fall short of the k5000 in many areas, namely by limiting to only two oscillators as opposed to the k5000's max of 6, and also in less polyphony possible (though this will depend on CPU speeds). Though, in it's defense, the K5000 only allowed 64 harmonics per oscillator, so technically each oscillator of Additive synth does as much as 2 K5000 oscillators.
1.2 What is Additive Synthesis
A good resource is here, and there are many other resources on the net. Please check them out. Basically, all sounds can be expressed by the adding up of individual sine-wave tones at different frequencies. A pitched sound is usually made up of individual sinewaves, called "partials" whose frequency is some ratio of the main pitch, or the fundamental. For instance, a square wave is made up of only odd partials, or partials that have the ratios: 1 * frequency, 3 * frequency, 5 * frequency, etc. Since these partials have whole number ratios to the fundamental, we call them harmonics.. By specifying the volumes of each of these harmonics, we can create many kinds of waveforms. Conceivably, a sound in nature can have an infinite number of partials (and even non-harmonic ones). On a digital system, the number is finite. The maximum frequency that can be expressed is limited to 1/2 of the sample rate (also known as the nyquist frequency). Additive synth will let you specify up to 128 harmonics, though only some of these will be heard on middle octave and higher octave notes. On lower notes, chances are that you will hear all 128 harmonics. Each oscillator is limited to creating harmonic sounds, however, with the ring modulation Mix Type and by detuning the second oscillator, we can create some non-harmonic sounds. Bell sounds are one example of non-harmonic sounds.
1.3 Parts of Additive Synth
The first part is the Oscillator section. We have two osc's to work with. You can load your own sounds by right clicking on the machine, picking "load wave" and selecting a raw file to load. Some example files are provided, and can be found in your generators directory. See the section on "Creating your own waves" for more info on how to create your own. The oscillator section allows you to control the wave sequence index, and also the phase of the oscillators. The next part is the Mix section which controls how the two oscillators are used in conjunction with each other. Next we have the amplitude envelope which controls how the sound gets louder or softer in response to your playing. Attack is the amount of time it takes before a sound reaches full volume, decay is the time to drop down to the sustain level, and release is the time it takes to fade out. The same goes for the next section called "ENV1". This is an assignable envelope that can be used to control many things, including pitch and the oscillator indexes. LFO1 and LFO2 (meaning Low Frequency Oscillator) are oscillators that can be assigned to control different parameters as well. Then we have the Assignable section which actually controls which things get routed to what and how much they modulate them.
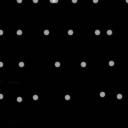
2.1 The Oscillator Section
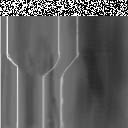
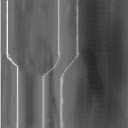
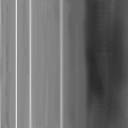
As we said, each oscillator is represented by a 128 x 128 block. This block, we have been calling a "Wave Table" or "Wave Sequence". <INSERT PIC>
Each row on the block represents all 128 harmonics that are played at one time. We have 128 of these "time indexes" and you can set which index is being played by changing the values of "OSC1Index" and "OSC2Index". These parameters can also be modulated with the LFO's and ENV1. By modulating the index we can create changes in the timbre or tone of the sound. It's recommended that you try different waves and experiment to see what I mean. Some wave tables, such as the Saw and Square wave contain no changes over time and simply represent a static tone. Feel free to create new versions of these with your own changes - Saw and Square make good bases for editing. By default, the saw wave is loaded. Phase does exactly what you expect by allowing you to initialize the phase of the oscillator to a set value. By setting the Limit parameter, you can lower the number of harmonics actually rendered - this lowers CPU usage. You should do this if you are dealing with sounds that aren't very bright and don't need the extra harmonics.
3.1 The Mix Section
In the Add and Subtract modes, the output of the two oscillators is summed. The MixBalance parameter allows you to set the Mix between the two. In the RingMod mode, OSC1 is multiplied by OSC2. This can be used to create metallic and harsh sounds. In this mode, mix balance does nothing. In Formant mode, OSC2 is not rendered as usual, but instead it's wave table is used as a Formant sequence. So, you can still set OSC2's index and modulate the index just as you would with an oscillator. You can also use the OSC2 Semi and Detune parameters to shift the formant filter up and down however, at this time, OSC2 pitch modulation has no effect on this. MixBalance also does nothing in this mode.
3.2 The formant mode
Another reference from the same site as before. Formants are frequency zones that are boosted or cut in accoustic instruments and voices because of the shape of the instrument. this is how our human throats can form different vowel sounds - by changing in shape and creating different formants. You can play an instrument at different notes but the formants stay fixed. So, formants are very important for creating realistic accoustic instrument sounds or vocal sounds. We can also use the formant filter to imitate analog synth sounds. There are 128 bands to the formant filter. The frequencies of the bands go linearly from 0 to 5000 hz. Many examples are included (all the waves marked as FF_) to get you started for making vocal type sounds and basic filter sounds. Please check these out.
4.1 The Mod Section
With the mod section, you can route the LFO's and ENV1 to modulate various things, such as Oscillator Pitch, amplitude and OSC indexes. Simply set the source to either LFO1, LFO2 or ENV1. Destination can be set to OSC1 Index, OSC2 Index, OSC1 or OSC2 pitch, or Amp. By modulating the index you can create interesting timbral changes.
5.1 Tricks and Tips
- To make a Square wave with changeable pulse width, load Saw.Raw for osc1 and osc2. Set the Mixmode to subtract. This will give you a square wave. By changing the phase, you can change the pulsewidth of the square wave
- The Saw and Square waves have no changes in their wavesequence. You can use these as a base to build other sounds. Also notice that these waves are not very bright, but they sound good. Keep that in mind when making your own waves - the first 16 or so harmonics are the most important for determining the sound.
- Always turn off modulation routings to save CPU if they are not being used
5.2 Making Arpeggios and rythmic sequences
Basic kinds of arpeggios can be made using the Arp waves for the LFO shapes and by setting the LFO speed to be based on Ticks (the high values of the speed parameter will read N Ticks). Also, turn on LFO Sync so that the sequence can start on a note. By setting up your Wave sequences in a rythmic manner and using this property, you can also get rythmic timbral changes. IE, have changes in the .RAW appear at intervals like 16, 32, 48, 64, etc.
5.3 Making your own wavesequences
.RAW files follow a very simple format and can be loaded easily in Photoshop. Simply load them as 128x128 raw files, 8 bit, and no header. Once you load a .RAW in a song, it is saved in the .BMX file, so any changes to the .raw on disk will not affect your song. The columns in the waveform are the harmonics, going from 1 to 128. The rows are the time indexes.
5.4 A note about presets
Since presets only save parameter data, you must load the .RAW files yoursef. Click 'edit' on the parameter window and check out the comments for each preset. On each preset, I've tried to mention what waves should be loaded to get the intended sound.
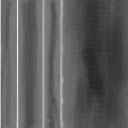
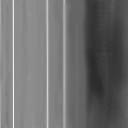
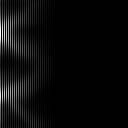
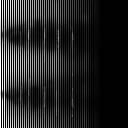
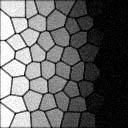
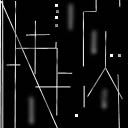
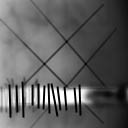
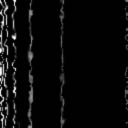
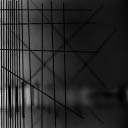
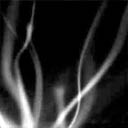
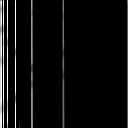
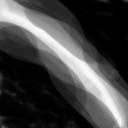
Appendix A - Sample Waves


|
|
 FF_eehahh |
 FF_Fract1 |
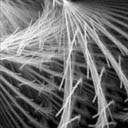 FF_Fract2 |
|
|
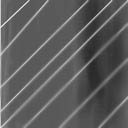 FF_Linez |
 FF_Lp |
 FF_LP_lowres |
 FF_Noise |
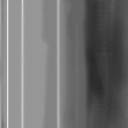 FF_ooh |
 FF_Thickband |
 FF_U |
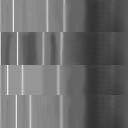 FF_Vocal_Fun |
 FF_VocalFun2 |
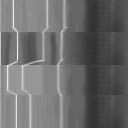 FF_VocalfunSmooth |